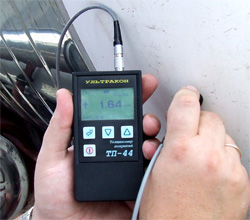
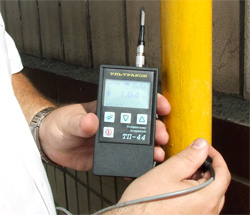
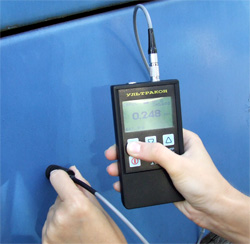
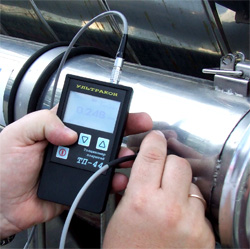
 Coating thickness gauge TP-44 provides the ability to measure:
- thickness of paint and varnish and electrically conductive non-magnetic coatings on steels;
- thickness of paint and varnish coatings on non-ferrous metals and non-magnetic alloys;
- thicknesses of bituminous and thick-layer protective coatings on various metals;
- surface roughness before painting.
The device combines two methods for measuring the thickness of coatings: eddy-current parametric and inductive magnetic.
The device is designed to measure
- the thickness of dielectric (anodic oxide, paint and varnish, mastic, plastic, Teflon, radio-absorbing, etc.) and non-ferromagnetic conductive coatings on ferromagnetic bases using induction converters ID0, ID1, ID2, F2, F4;
- thickness of dielectric coatings on electrically conductive non-ferromagnetic bases using parametric converters PD0, PD1, dielectric thick-layer coatings on electrically conductive bases using parametric converters PD2, PD3, PD4;
- point measurement of the depth of the depressions using the DSh1 sensor.
More ...
Hide
 The advantages of the device include:
- wide range of measured thicknesses;
- implementation of eddy current and induction measurement methods in one device;
- large informative graphic indicator (128x64 pixels) with bright white backlighting;
- simultaneous display of the necessary information on the indicator, clarity of its presentation;
- intuitive control of the device, which increases the operator's productivity;
- minimum thickness indication;
- simultaneous display of the current and average results, as well as the number of measurements;
- indication of the beginning and end of the measurement;
- indication of the type of the connected sensor;
- memory of measurement results with page (file) organization;
- data transfer to PC via USB interface;
- battery discharge control;
- self-shutdown of the device when idle;
- small dimensions and weight;
- operating time from one set of batteries - 45 ± 10 hours, battery discharge level control;
- degree of dust and moisture protection IP54.
Technical characteristics of TP-44:
| Measured thickness range (depending on the type of sensor) | 5 μm ... 60 mm |  |
| Results memory locations | 2000 | |
| Number of Result Memory Pages | up to 200 | |
| Overall dimensions, mm | 122x65x23 | |
| Working temperature range, ° С | from -5 to + 40 | |
| Food | 2 AA batteries or accumulators | |
| Weight of electronic unit with battery, no more, kg | 0.2 |
Main technical characteristics of sensors:
| Coatings on steels (dielectric and electrically conductive coatings on ferromagnetic metals and alloys) | |||
Sensor type | Coating thickness | Measurement error | Sensor dimensions, mm |
| F2 sensor | 0-5000 μm | ± (3% + 2 μm) | d17x40 |
| sensor ID0 | 0-300 μm | ± (3% + 1 μm) | d5x40 |
| sensor ID1 | 0-500 μm | ± (3% + 1 μm) | d7x14 |
| sensor ID2 | 0-2000 μm | ± (3% + 2 μm) | d9x35 |
| Coatings on non-magnetic metals (dielectric coatings on non-ferromagnetic metals and alloys) | |||
| PD0 sensor | 0-500 μm | ± (3% + 2 μm) | d12x35 |
| PD1 sensor | 0-2000 μm | ± (3% + 2 μm) | d12x35 |
| Thick coatings on metals (dielectric coatings on metals) | |||
| F4 sensor | 0-15 mm | ± (3% + 0.02 μm) | d25x45 |
| PD2 sensor | 0.5-12 mm | ± (3% + 0.02 μm) | d15x50 |
| PD3 sensor | 1-30 mm | ± (3% + 0.03 μm) | d40x50 |
| PD4 sensor | 1-60 mm | ± (3% + 0.05 μm) | d70x60 |
| Roughness measurement, Rz (after sandblasting before painting) | |||
| DSh1 sensor | 2-360 μm | ± (3% + 2 μm) | d12x45 |

Examination of metals and alloys
The prices are approved by the director of LLC "In Consulting" 04.05.2026. Deadlines are indicated in working days
For a free consultation, you can use On-line consultation, or call us or write to the messengers.For information about the cost of services go to Tariffs or place Application for Services.


